
How to Make a Gingerbread House Lantern at Our St Neots Pottery Class
Quick answer: you can make your own ceramic gingerbread house lantern at Crafty Monkey Studio, St Neots, by booking our House Lantern Pottery Class. It is beginner friendly, takes around 3 to 3.5 hours, and includes clay, tools, underglazes, glazing and kiln firing. Your lantern is ready to collect around 4 to 5 weeks after your class.
Gingerbread houses are peak cosy season, but the edible kind goes stale, collapses or gets eaten by Boxing Day. A ceramic gingerbread house lantern lasts for years. Pop a tealight inside and the windows glow, which is exactly the kind of main character winter energy your shelf needs.

What happens in our gingerbread lantern pottery class?
Roll out your slabs. Our team shows you how to roll clay into even sheets, the base of slab building.
Cut your walls and roof. Shape the sides and roof of your house.
Cut out windows and a door. This is where the candlelight glows through.

Build your house. Join it all together with the score and slip method so it holds strong in the kiln.
Add the gingerbread details. Clay candy canes, gingerbread people, sweets or whatever you fancy.
Paint it. Mix gingerbread colours with our underglazes, then add candy cane reds, greens or any colours you like.
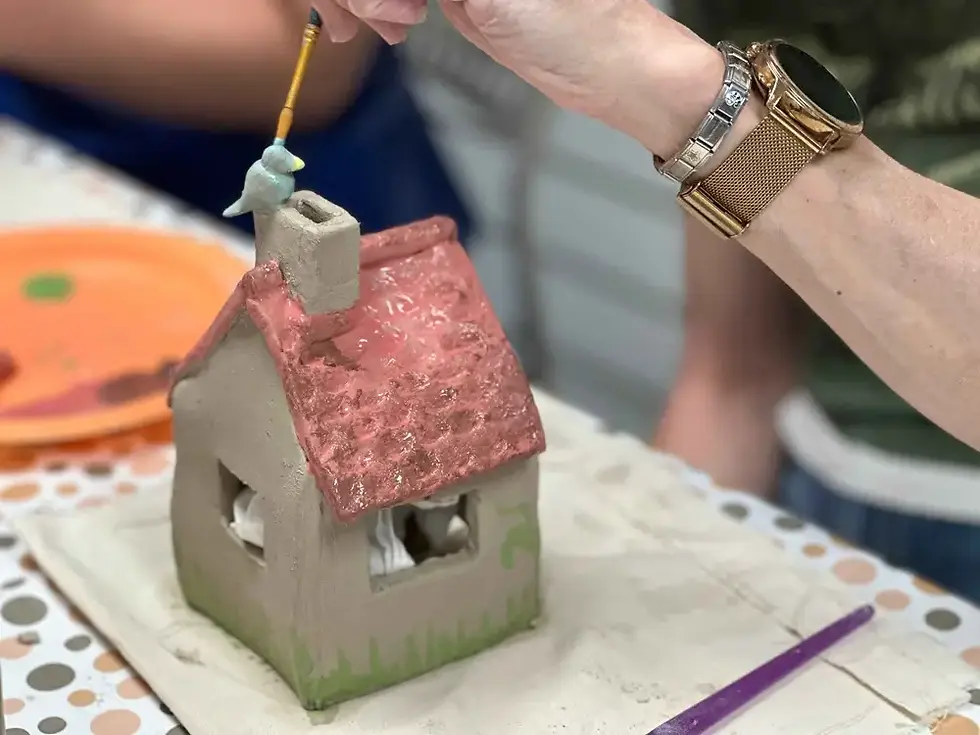
Leave it with us. We let it dry, glaze and kiln fire it, then email you when it is ready to collect.
Gingerbread lantern design ideas

Classic gingerbread: warm biscuit brown, white icing details, red and green sweets
Pastel candy house: pink, mint and cream, very sugarplum
Frosted Nordic: creamy white with a snowy roof and minimal details
Moody gingerbread: dark chocolate tones for a cosy gothic look
Personalised: your house number, family name or pet's name above the door
Gingerbread village: book with friends, each make a house, and line them up together
Will it be ready for Christmas?
Your lantern needs to dry fully before it goes in the kiln, so allow 4 to 5 weeks from your class. If you want it home for Christmas, aim to book a class by mid-November. Festive classes fill up fast, so book online early.
Tips for your gingerbread house lantern

Use a standard tealight, or a battery LED tealight if you want to leave it glowing on a shelf or in a child's room
Style it on a windowsill, mantelpiece or as a Christmas table centrepiece
It makes a thoughtful handmade gift for mum, a new homeowner or your best mate
Bring it out every December and it becomes part of your Christmas tradition
Make it a festive activity
Book a class for a Christmas date, a catch up with friends or a bit of solo self care. Got 6 or more? Book a private group pottery class for a work Christmas social or festive get together. Fill in our group enquiry form (scroll to the bottom of the page).
Prefer a different festive make?
Our Christmas Tree Lantern Pottery Class uses the same slab building technique to make a glowing tree, or try a tealight holder lantern with cut out patterns.
Gingerbread lantern class FAQs
Is the gingerbread house lantern suitable for beginners?
Yes. No experience is needed, our team guides you through every step.
Which class do I book?
Book the House Lantern Pottery Class and select the gingerbread house project on the booking form. If you can't decide on the day, that's fine too, you can choose when you arrive.
How long is the class?
Around 3 to 3.5 hours.
Do I need to bring anything?
No, all clay, tools and underglazes are provided. It can get a bit messy, so bring an apron if you like or we can lend you one.
Can children make one?
Yes, ages 8 and over. Under 10s need a participating adult with them.
Can I make a different style of house?
Yes. Cosy cottages, spooky towers, beach huts and fairy tale houses are popular too.
When can I collect my lantern?
Around 4 to 5 weeks after your class. We email you when it is ready.
